Air/Fuel Ratio Meter
March 19, 2017


Home
About our TR6
Six Tech Manuals
1980 TR8
5 Vane Water Pump
Convertible Top 2013
Exhaust Manifold 2013
Voltage Stabilizer 2012
Space Saver Spare
Trafficator 2012
Parts Sale 2011
BobbyD Fender Blanket
Fuel Pump 2011
Brake Adjusters 2011
Heater Valve 2011
Console 2010
Dyno Day 2010
95 Amp Alternator
CV Axles T/A Repair
Fuse Panel Conversion
Miata Seat Conversion
Hardtop Restoration
Hardtop Carrier
Luggage Rack
Gauge Calibration
Gauge Refurbishing
NET DOT 2009
Repainting 2008
Dash Replacement
Machining Block 2008
Machining Head 2008
Cam Bearings 2008
Thrust Washers 2008
Engine Assembly 2008
Engine Installation 2008
Silicone Cover Gasket
Fuel Pump Rebuild
Damper Rebuild
Throttle Pedal Rebuild
Ratco Cable Linkage
Air/Fuel Ratio Meter
PDWA Rebuild
Rheostat Rebuild
Alternator Swap
Frame Parts & Coating
Frame Parts Assembly
Frame Before Stripping
Frame Strip & POR15
Brake Restoration
Cylinder Head Swap
Triple Carb Rebuild
Triple Carb Installation
Roadster Factory Tour
Spring 2007
Dyno Day 2007
Engine Restoration
Paint Detailing
Glass Replacement
Bumper Rechroming
Distributor Overhaul
Distributor-Adjustable
Clutch Replacement
Carpet Replacement
Differential Overhaul
Heater Overhaul
Past Improvements
Favorites


One project seems to beget another project as this followed the first
cylinder head shaving and the triple carbs as a way to tweak them in after the
dead rich mixture that I got on the Dyno runs last fall.  Open hood, insert money!

This project requires some modification to the exhaust header in the form
of a bung being welded in place to allow the installation of the oxygen sensor.

**** Viewers are warned that if they attempt any mechanical repairs
or modifications, or follow procedures referred to here, they do so at their
 own risk, and no liability will attach to either me or Jamie's Performance Muffler Shop.****


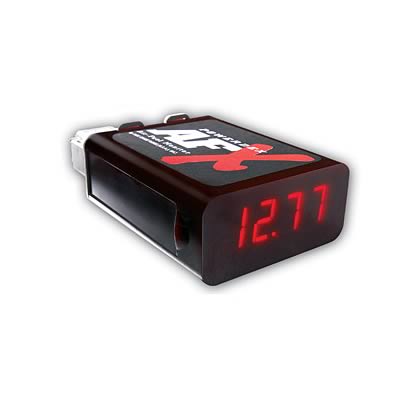
This is the NGK Air Fuel Ratio Meter that can be mounted under the dash.

This is the complete kit from NGK.

A few electronic items are needed as you must pre-heat the wide band oxygen
sensor prior to the calibration process.  A 12V power supply, digital multimeter
to check voltage and a digital infra red temperature gauge verifies the setup.

This power supply puts out perfect voltage for the calibration process..

The wiring harness hooked into one of my spare Ham Radio power supplies.

You want to keep this sensor away from anything flammable or pets and nosy people.

It's warming up, but not quite where I need it.

Now it's ready to be calibrated.

The calibration process begins according to the instructions.

Final calibration is done and it's max lean because there's no fuel in the air.

The bung and plug to cap it off in case you decide to remove the sensor.

Out of the drill press and into the vise.

A quick skim with the grinder after drilling and prior to test fitting the bung.

Just a little more grinding to get the right area for fitting the bung and filling with weld.

The bung is welded in place with the cap screwed in so that it won't distort.

This work is best left for an expert.  It took longer to cool than
to do the entire welding and re-installation of the exhaust system.

A nice neat solid weld that will last forever.

I made the mistake of touching this 35 minutes after welding and burned three fingers.

The wideband sensor is installed and we are ready to go.

A temporary location for tuning.  Easy to see from under the hood and test driving.

It's really a nice feature to be able to move it in and out of the car easily.

A little rich for idle, but close enough for now. 
It really needs to be run on the open road before any more adjustments.

After tuning the carbs a bit, you have to clear them out and when it
comes back the reading generally goes dead lean until the engine stabilizes.

Warming up a cold engine with 90% choke.

Warming the engine on choke gives a rich mixture,
which is exactly what it reads at Wide Open Throttle.

Still some tuning to go now that the new engine is broken in.

Thanks to Jamie's work underneath, a nice, neat and simple installation. 

Jamie's Performance Muffler Shop
45 Alden Street
Pawtucket, RI 02861

(401) 725-7473


74TR6.com © 2017

Home | About our TR6 | Six Tech Manuals | 1980 TR8 | 5 Vane Water Pump | Convertible Top 2013 | Exhaust Manifold 2013 | Voltage Stabilizer 2012 | Space Saver Spare | Trafficator 2012 | Parts Sale 2011 | BobbyD Fender Blanket | Fuel Pump 2011 | Brake Adjusters 2011 | Heater Valve 2011 | Console 2010 | Dyno Day 2010 | 95 Amp Alternator | CV Axles T/A Repair | Fuse Panel Conversion | Miata Seat Conversion | Hardtop Restoration | Hardtop Carrier | Luggage Rack | Gauge Calibration | Gauge Refurbishing | NET DOT 2009 | Repainting 2008 | Dash Replacement | Machining Block 2008 | Machining Head 2008 | Cam Bearings 2008 | Thrust Washers 2008 | Engine Assembly 2008 | Engine Installation 2008 | Silicone Cover Gasket | Fuel Pump Rebuild | Damper Rebuild | Throttle Pedal Rebuild | Ratco Cable Linkage | Air/Fuel Ratio Meter | PDWA Rebuild | Rheostat Rebuild | Alternator Swap | Frame Parts & Coating | Frame Parts Assembly | Frame Before Stripping | Frame Strip & POR15 | Brake Restoration | Cylinder Head Swap | Triple Carb Rebuild | Triple Carb Installation | Roadster Factory Tour | Spring 2007 | Dyno Day 2007 | Engine Restoration | Paint Detailing | Glass Replacement | Bumper Rechroming | Distributor Overhaul | Distributor-Adjustable | Clutch Replacement | Carpet Replacement | Differential Overhaul | Heater Overhaul | Past Improvements | Favorites

This site was last updated 03/19/17